Laser Cutting
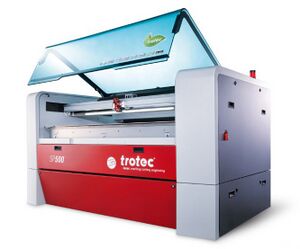
Laser cutters use high-power laser systems which allow for precise and fast cutting of materials. DBE has 12 laser cutters in total; 2 are technician-operated large format laser cutters, and 10 small-format laser cutters that students can operated once trained.
Prepare your files for laser cutting using the information, guides, and templates below.
Laser cutting equipment
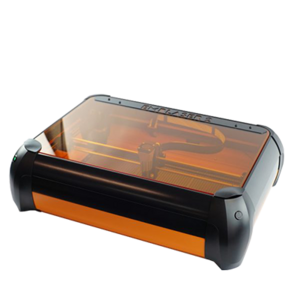
Emblaser 2 This equipment can be operated by students who have completed a laser cutting badge. Students must watch the equipment for the entire process.
Materials
- Polycarbonate
- PVC (vinyl)
- Anything containing chlorine
- Some metals
- MDF
- Any materials without a Safety Data Sheet (SDS/MSDS)
Materials that can be cut and/or engraved
In the Makerspace, you can only process materials supplied by the workshop:
- Plywood 3mm and 6mm thick, up to 1200 x 600mm in size
- Strawboard 1mm and 2mm thick, up to 900 x 600mm in size
You cannot bring in other materials to cut on the Makerspace laser cutters.
In the Digital Modelling Workshop, you can use supplied plywood, strawboard, or acrylic in limited colours, up to 900 x 600mm in size. You can also bring other material that is not stocked, such as:
- Cast acrylic
- Wood (thin veneers, plywood, balsa)
- Fabric (natural or acrylic based)
- Leather
- Card and paper
- Polypropylene
- Acetate
Some materials can be engraved only, including:
- Glass and ceramics
- Solid wood
- Some metals
Please discuss using any materials that are not supplied with a technician before bringing them to the workshop. We can recommend suppliers and ensure that you are making an appropriate choice for your project.
Material costs
Some units require you to pay a consumables fee, which covers the cost of some or all of your materials.
If your material costs are not covered by a consumables fee, you will need to pay for supplied laser cutting materials at cost price as you use them.
File Preparation
Vector files only
What is a vector file?
A vector graphic file contains a vector image rather than a raster/bitmap image. Vector graphics are constructed of shapes, lines, and points, which do not lose resolution or quality when scaled – think of text in a PDF.
Software that can create vector files
You can create vector files with software that you might already use, such as:
- AutoCAD
- Rhinoceros 3D ("Rhino")
- Adobe Illustrator
- CorelDraw
- Inkscape
Many tutorials for this software are available online. You may also be able to get help using these programs from your tutor or from LinkedIn Learning.
Identifying a vector file
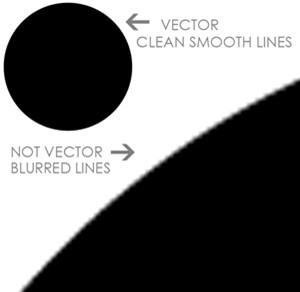
Vectors need to be made in your vector program, not just copied and pasted in or imported. If you save your work as a raster format (e.g. psd, jpg, or bmp) it will be rasterized and cannot be converted back into a vector file. If you zoom in on your vector file, you will be able to identify that it does not lose resolution, whereas a raster file will become pixelated or blurry:
Size and colour scheme
Your document/artboard/sheet size should match your material size. Leave a 5mm minimum margin from the edge of your material to your objects.
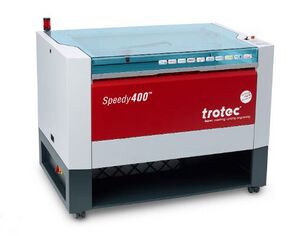
Trotec laser cutters (SP500 and Speedy 400 Flexx)
RGB red: cut
RGB green: vector engraving (“etching”)
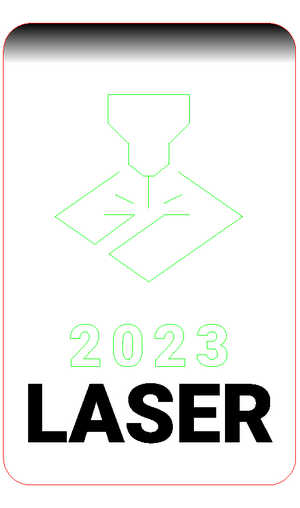
RGB black/greyscale: raster engraving
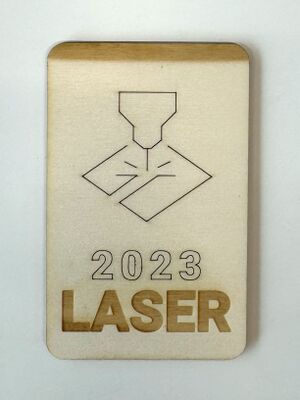
Raster engraving is used to fill areas, either with a single depth/tonality using black or to create gradients, tone, or images, using greyscale.
Emblaser 2
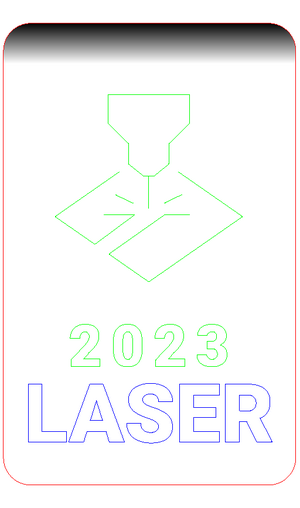
Raster engraving is slightly different. Use the following colour scheme:
RGB red: cut
RGB green: vector engraving (“etching”)
RGB blue: solid fill raster engraving
RGB greyscale: raster engraving to produce gradients, tone, or images
All other colours will be ignored.
Cut lines and vector engraving must be lines of the smallest default stroke width possible in your software (e.g. “hairline” or “0.01”), with no fill.
The laser will see every line in your file, including those hidden under others. For this reason, you need to remove any doubled lines in your file. Double cut lines can cause damage to your work, material, and the laser cutter.
Nesting
Make sure to keep at least 5mm from the edge of your material, and at least 1mm between shapes. This allows latent heat to disperse from your material, preventing charring and the risk of fires.
Work must be nested to make your cutting times and material use efficient.
File size and format
Export each sheet of material as a separate PDF at your material size (e.g. 900 x 600mm).
Examples
Software-specific guides and templates
AutoCAD
AutoCAD File setup guide (PDF)
AutoCAD Laser cutting template Trotec SP500 (dwg)
AutoCAD Laser cutting template Emblaser 2 (dwg)
Rhinoceros 3d
Rhino Laser cutting templates (3dm)
Fusion 360
Fusion360 Laser cutting guide (PDF)
Illustrator
Coming soon
External Links
Guide: Creating a Contour Model by Melbourne School of Design's Fab Lab
