3D Printing: Difference between revisions
Amy.Hickman (talk | contribs) m (Added info on printers and materials, deleted dead links) |
Amy.Hickman (talk | contribs) m (edits to intro) |
||
| Line 1: | Line 1: | ||
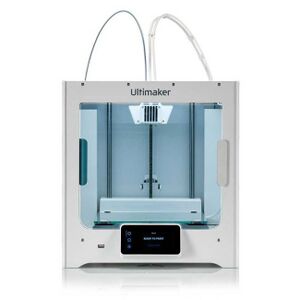
[[File:Utlimaker S5.jpg|thumb|Ultimaker S5 for large-scale FDM printing.]] | [[File:Utlimaker S5.jpg|thumb|Ultimaker S5 for large-scale FDM printing.]] | ||
3D Printing or additive manufacturing is the process of creating physical 3D objects from a digital model. | 3D Printing or additive manufacturing is the process of creating physical 3D objects from a digital model. We use Fused Deposition Modelling printing (FDM) technology for printing 3D models into physical objects. This is available to all students in DBE. | ||
{{Note | {{Note | ||
| Line 8: | Line 8: | ||
}} | }} | ||
The DBE Makerspace contains 22 3D printers. You can also access 3D printers in the 202 Digital Modelling Workshop. | Learn more about [[Inductions and training|Makerspace inductions]]. | ||
The [[About Makerspace|DBE Makerspace]] contains 22 3D printers. You can also access 3D printers in the 202 Digital Modelling Workshop. | |||
== Specifications == | == Specifications == | ||
Revision as of 10:31, 26 March 2024

3D Printing or additive manufacturing is the process of creating physical 3D objects from a digital model. We use Fused Deposition Modelling printing (FDM) technology for printing 3D models into physical objects. This is available to all students in DBE.
3D printing requires a General Makerspace Induction and 3D Printing badge.
Learn more about Makerspace inductions.
The DBE Makerspace contains 22 3D printers. You can also access 3D printers in the 202 Digital Modelling Workshop.
Specifications
Dimensions
| Type | Quantity | Build Volume | No. of Extruders | Resolution | Location |
|---|---|---|---|---|---|
| Ultimaker 2+ Connect | 10 | 223 x 220 x 205mm | 1 | 0.06 – 0.2mm | 418 Makerspace |
| Ultimaker S3 | 11 | 230 x 190 x 200mm | 2 | 0.06 – 0.8mm | 418 Makerspace |
| Ultimaker S5 | 1 | 330 x 240 x 300mm | 2 | 0.06 – 0.8mm | 418 Makerspace |
| Ultimaker 3 Extended | 1 | 215 x 215 x 300mm | 2 | 0.06 – 0.8mm | 202 Digital Modelling |
| Markforged Onyx Pro | 1 | 320 x 132 x 154mm | 2 | 0.1 – 0.2mm | 202 Digital Modelling |
Materials Available
| Material (click to view SDS) | Description | Available Colours |
|---|---|---|
| PLA (polylactic acid) | Good for most 3D print projects. Easy to print, with relatively high strength, low thermal expansion and good adhesion, but low heat resistance | White, pearl white, black, transparent, silver, grey, blue, green, teal, purple, red, orange, yellow |
| Tough PLA | Similar strength to ABS and heat-resistant to 58°C | White, black |
| TPU95A (thermoplastic polyurethane) | Flexible, elastic, chemical-resistant filament | Red, black, white |
| PVA (polyvinyl alcohol) | Water-soluble support material, for specialised applications only | Natural |
| Carbon fibre filled nylon (Onyx Pro only) | High strength, toughness, and chemical resistance; can be reinforced with continuous fibre to yield aluminum-strength parts. For applications where strength is a requirement, e.g. plastic part replacement, housings, or mounts. | Black |
Setting up your Files
Check for modelling errors
Common issues with 3D printing occur due to bad geometry, please make sure you check you meshes for the following before handing it to the technician team:
| Error Type | What this is? | What does it causes? | How do you fix it? |
|---|---|---|---|
| Non Manifold Geometry | When an objects has edges that are not totally connected or objects with added faces. The object does not have volume. | Doing this causes some or all of the model to have no volume making it impossible to print. | Geometry must be fully enclosed (watertight), and only 2 faces may share an edge. |
| Non Unified Faces | When an mesh’s faces (normals) are not all facing in the correct direction. | Doing this cases printing software to not understand what is inside or outside the model leading to unexpected results. | Check that your face’s normals are all facing the correct direction. |
| Support Issues | When there are not enough support structures to print parts of an object in mid-air. | Without supports, your object may fail to print and break apart. | Supports can be added during the printing process but it is also recommended you support anything over a 45 degree angle or to print your object in multiple pieces you glue after printing. |
Check list
- Check for Non-Manifold Errors
- Check for Naked Edges
- Fill/ Cap Holes
- Unify Normals
- Convert your model to a Mesh
- Export your model as a .stl file
Documentation
No content here yet