Motion Capture Suit: Difference between revisions
No edit summary Tags: Manual revert Visual edit |
|||
| (7 intermediate revisions by the same user not shown) | |||
| Line 69: | Line 69: | ||
===== Recalibrate Sensors ===== | ===== Recalibrate Sensors ===== | ||
If you notice that any of your sensors may be more magnetized than others, you can perform a magnetic calibration on that individual sensor. Simply remove the sensor and attach it t[[File:Perception Neuron 32 labeled bag.jpg|thumb|A label located on each bag for reference of where to place back each part of the equipment.]] | |||
=== | === Returning the Suit === | ||
When you have finalised using the Perception Neuron suit, please ensure you place each piece of the suit in its respective bag. Each part of the suit will be labeled and have an accompanying icon. | |||
==== | === Additional Resources === | ||
* [https://www.youtube.com/playlist?list=PLWSuC5-Qj9AFQjnNIHuxH1hQn9RuriJev Setup Guide and tutorials] | |||
* [https://www.dbemakers.com/images/3/3b/PN_Quickstart_Guide.pdf Quickstart Guide] | |||
* [https://marketplace-website-node-launcher-prod.ol.epicgames.com/ue/marketplace/en-US/product/neuron-live-link?sessionInvalidated=true Unreal Engine Live Link] | |||
[[Category:Multimedia]] | |||
[[ | |||
Latest revision as of 15:15, 24 June 2024

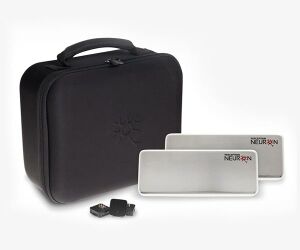
Perception Neuron 32 motion capture suit is capable of full-body tracking. It is capable of tracking motion data and converting into in standard file formats including FBX.
- Face motion capture not included.
- For wireless tracking, a router is required (router not included).
Specifications
| Quantity | Risk Assessment |
|---|---|
| 1 | None, however prior training with a technician is required. |
Equipment List
| Equipment | Quantity | Notes |
|---|---|---|
| Neuron sensors | 32 | A majority are already applied onto the suit. Used for tracking. |
| Base Hub | 1 | |
| USB to mini USB cables | 2 | |
| Body Straps + Gloves | 1 | |
| Glove Replacements | 2 | |
| Dual pogo-pin Cables | 2 | |
| Instruction Manual | 1 | |
| PN Carry Case + bags | 1 |
Documentation
Optimising tracking
Reduce Magnetism
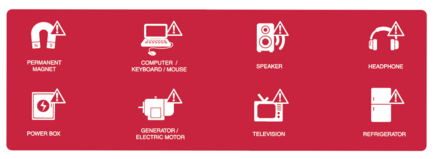
For optimal tracking results, it is recommended you keep away from magnetic surfaces as this can cause significant errors in motion capture results. Furthermore, prolonged exposure to magnetic surfaces can cause the sensors magnetisation which will irreparably affect the sensors. Depending on the strength of the source it is recommended you stay between 10-100cms away from such sources. This also includes objects that can contain magnets which include but are not limited to:

- Computers, Keyboards & Mice
- Speakers
- Headphones
- Power boxes
- Generators or electrical motors
- Televisions
- Refrigerators
Recalibrate Sensors
If you notice that any of your sensors may be more magnetized than others, you can perform a magnetic calibration on that individual sensor. Simply remove the sensor and attach it t

Returning the Suit
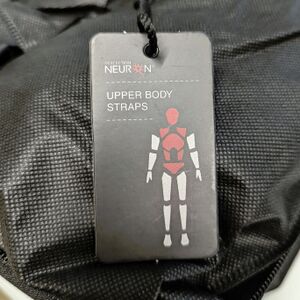
When you have finalised using the Perception Neuron suit, please ensure you place each piece of the suit in its respective bag. Each part of the suit will be labeled and have an accompanying icon.